
Integrated Plugins & Dialogues Systems
This asset is already compatible with the following third parties’ Dialogue Systems and Plugins. (Remember: you must enable TextMeshPro in your project.)
In case your plugin is not officially integrated, you can read here: how to manually integrate Text Animator with third parties plugins.
Easy Integration
To integrate the plugins in this section you don’t have to install any external packages. (However, you may have to disable their typewriter and replace it with TextAnimator’s one.)
- You can simply add the
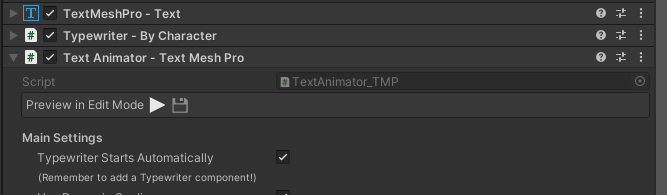
Typewriter(“By Character” or “By Word”) andaTextAnimator - TMPcomponents (near a TextMeshPro component) and set the “Typewriter Starts Automatically” value to true.
Here’s everything summed up in an image:
⚠️ Invisible tags appended to your text
If you're using Easy Integration, TextAnimator will add two invisible tags in appendix to your text in order to work. No worries, the text placement/layout will be left unchanged and it will act like if the tags are not written at all.
Explanation
This is to "force" TMPro/TextAnimator to being triggered when the text changes, even the same string has been written/pasted twice. You can disable this tag placement by adding the `#TA_NoTempFix` preprocessor define, but be aware that you won't be able to set similar texts multiple times subsequently (like text = "hello"; text = "hello") unless it has rich text tags (like text ="<shake>hello"; text = "<shake>hello").
The following plugins can be integrated also using the Easy Integration.
✔️ Dialogue System for Unity
How to setup 'Dialogue System for Unity' with 'Text Animator'
- Use TextMeshPro instead of Unity's built-in Text (more here).
- Remove Dialogue System's typewriters on the Text gameObjects you want to animate
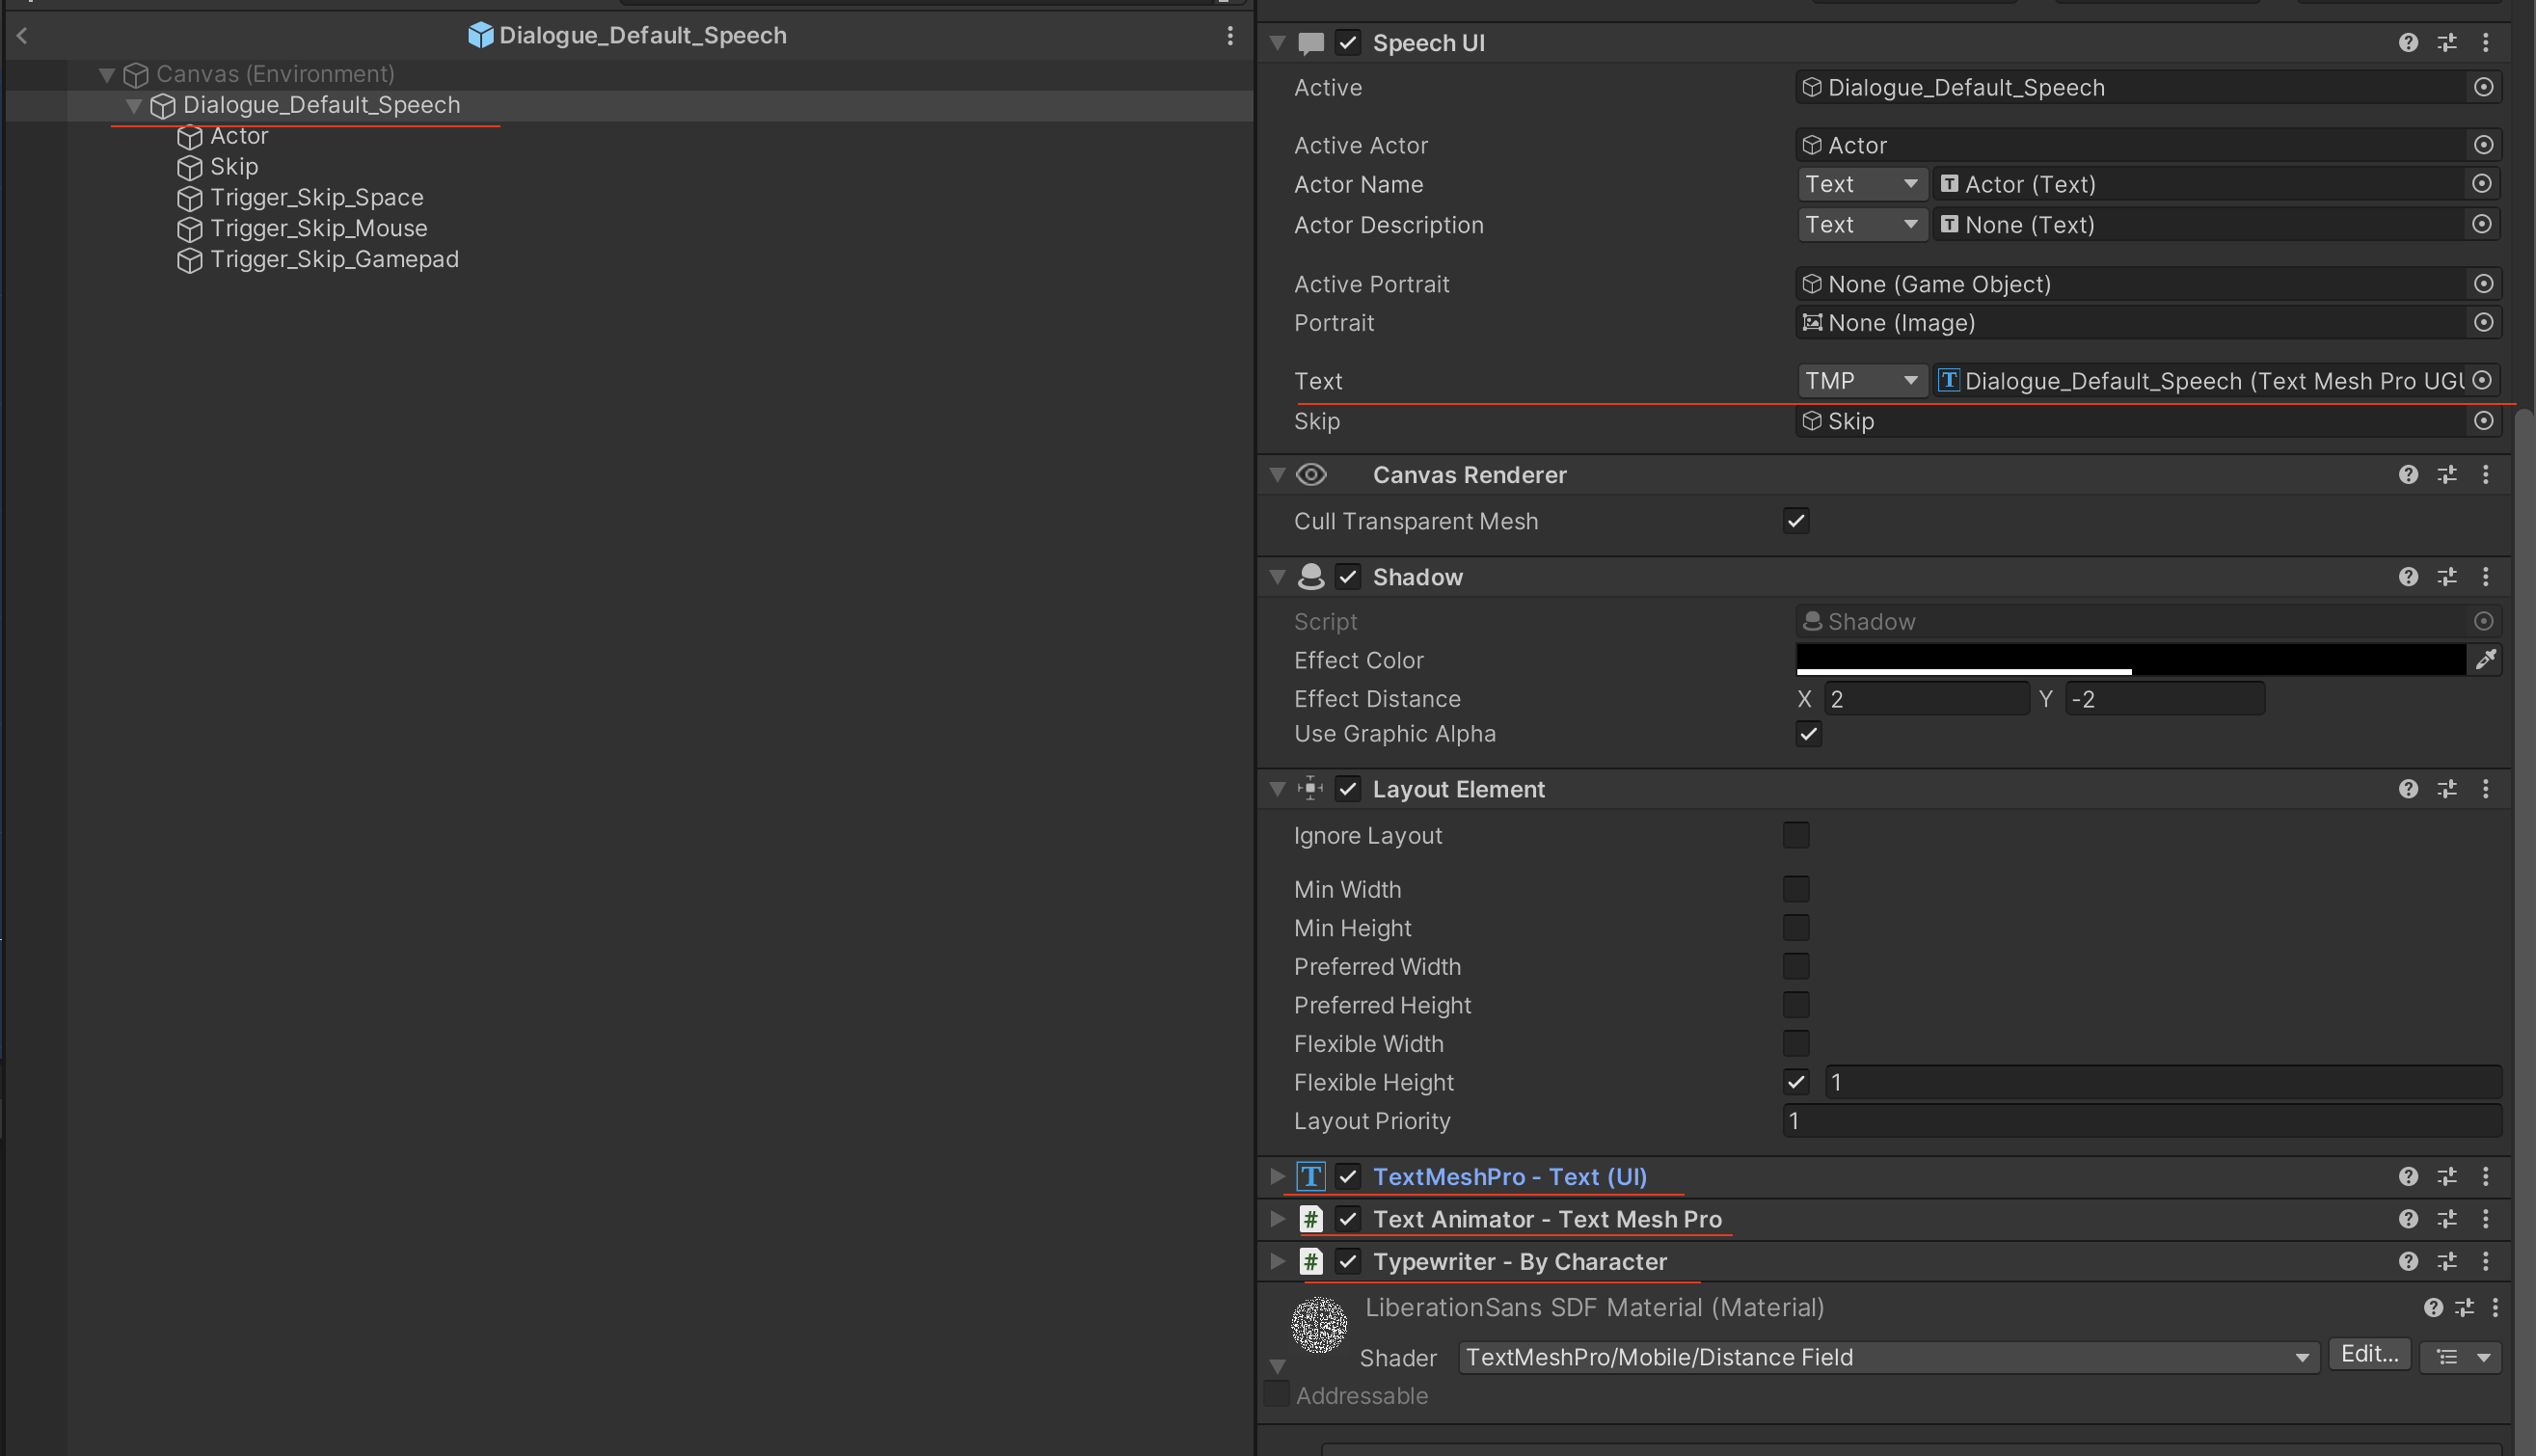
- Add the components "TextAnimator_TMP" and "TypewriterByCharacter" (or "TypewriterByWord"). to your dialogue text, as shown in the Easy Integration steps.
P.S. Be sure to have removed the DialogueSystem's Typewriter component and only use TextAnimator's one, or you might have some conflicts.
✔️ Yarn Spinner
Yarn Spinner (open source): website.
How to setup 'Yarn Spinner 2.X' with 'Text Animator'
You can integrate Yarn Spinner 2.X in two main ways.
- The first one is to use TextAnimator's typewriter (so, disabling Yarn Spinner's one), which is preferable in case you want to use all Text Animator's features like pausing the typewriter, waiting for player input and more.
- In the "Line View" script, disable "Use Typewriter" and "Use Fade Effect".
- Add the components TextAnimator_TMP and TypewriterByCharacter to your dialogue text, as shown in the Easy Integration steps.
- P.S. Based on how you setup your canvas, the text might flicker for one frame. If that happens, be sure to call "tmproText.ClearMesh(true)" before showing a new dialogue line, and once the canvas disappears. For example, as following if you have a "Continue" button:
- The second way is to keep using Yarn Spinner's typewriter (but you wouldn't be able to use Text Animator's typewriting features).
- In the "Line View" script, set "Use Fade Effect" and "Use Typewriter Effect" to true.
- Add a TextAnimator_TMP component to your dialogue text, and be sure to disable "Typewriter Starts Automatically".

How to setup 'Yarn Spinner 1.X' with 'Text Animator'
- Use TextMeshPro instead of Unity's built-in Text
- "DialogueUI" component, set "text speed" to 0.
- "DialogueUI" component, set the "OnLineUpdate" event with TextMeshPro's text.
- Add the components TextAnimator_TMP and TypewriterByCharacter to your dialogue text, as shown in the Easy Integration steps.

✔️ Ink
How to setup 'Ink Unity Integration' with 'Text Animator'
- Use TextMeshPro instead of Unity's built-in Text
- Add the components TextAnimator_TMP and TypewriterByCharacter to your dialogue text, as shown in the Easy Integration steps.
- You can now set your dialogues texts by referencing the TMPro's text in your Ink script, or you can reference the TypewriterByCharacter directly. (eg.
"typewriter.ShowText(inkDialogueLine);).
✔️ Game Creator 2
⚠️ From version 2.13.43, and requires the Dialgoue 2 module from 2.4.13.
How to setup "Game Creator 2" and "Dialogue 2" with 'Text Animator'
- Use TextMeshPro instead of Unity's built-in Text (more here).
- On the dialogue prefab that you will use for your dialogues, set the TMPro text and add the components "TextAnimator_TMP" and "TypewriterByCharacter" (or "TypewriterByWord"). to your dialogue text, as shown in the Easy Integration steps.
Remember to use Text Animator's typewriter (instead of GC2's one) if you want to use all events/actions features, otherwise only add a TextAnimator - TMP component.
✔️ Unity Localization Package
Unity’s Localization Package: manual here (check out your version!).
How to setup 'Unity's Localization Package' with 'Text Animator'
- Use TextMeshPro instead of Unity's built-in Text
- Add the components TextAnimator_TMP and TypewriterByCharacter to your dialogue text, as shown in the Easy Integration steps.
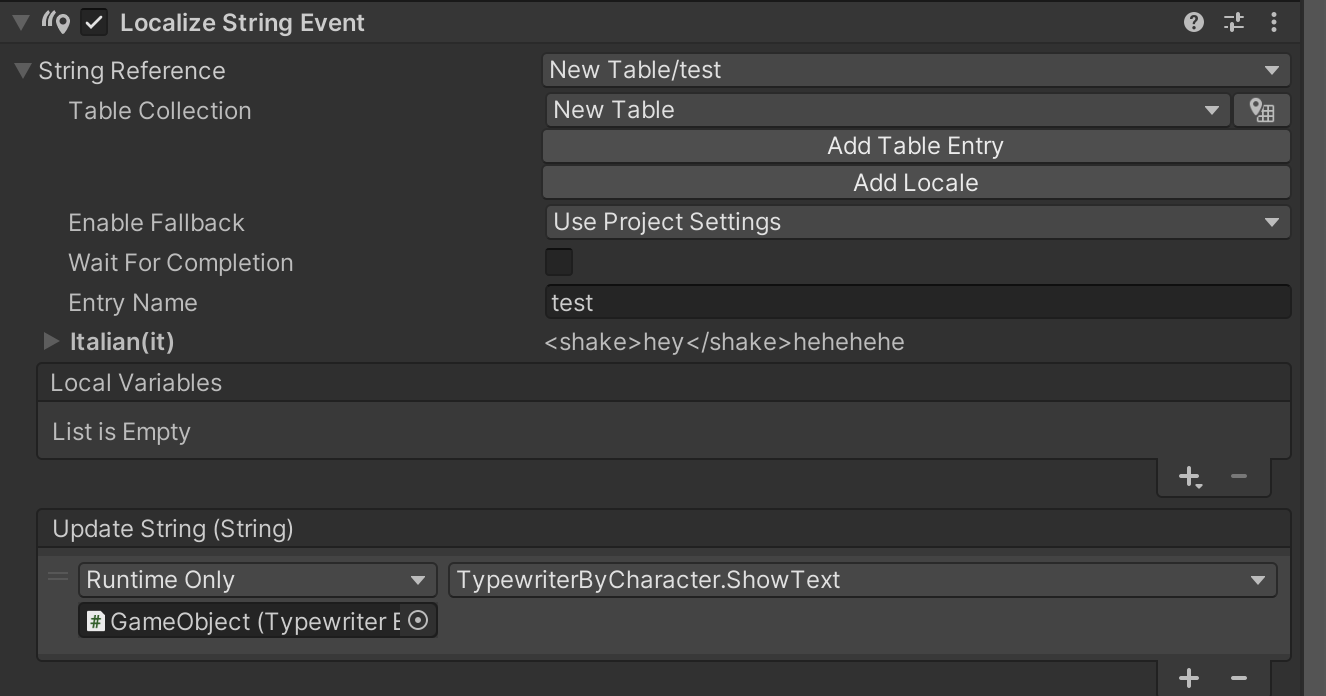
You can write Text Animator tags inside your tables/entries as usual, and then use the asset to show texts automatically. If you'd like to set the strings directly from Unity Localization, here's one example by accessing the typewriter's method:
Classic Integration
To integrate the following plugins, you can import the related integration package in your project, found in the TextAnimator/Integrations folder.
Don’t forget to a Typewriter and TextAnimator components (near a TextMeshPro one).
✔️ PlayMaker
How to setup 'PlayMaker' with 'Text Animator'
In order to create FSMs with PlayMaker, you have to extract the "PlayMaker - Integration" package in your project. You can find it in the Plugin/TextAnimator/Integrations folder.
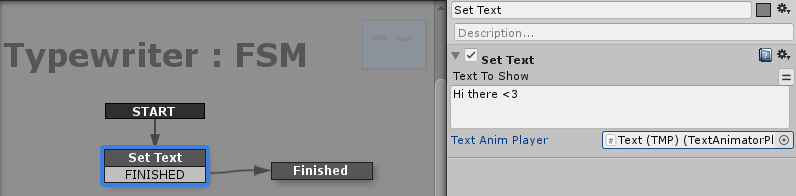
After doing so, you'll find its action added to PlayMaker, called "Set Text".

You can use it to set the typewriter's text, showing the text dynamically etc.
To edit its settings, edit the referenced `Typewriter` component in the inspector.
✔️ Unity Visual Scripting
You can install Unity’s Visual Scripting from the package manager, from Unity 2021 and beyond.
Package’s tested from version: 1.8.0
How to setup 'Unity Visual Scripting' Integration with 'Text Animator'
To use Text Animator with visual scripting, be sure to go to project settings -> visual scripting -> nodes, and add TextAnimator's Runtime assembly there, like this: 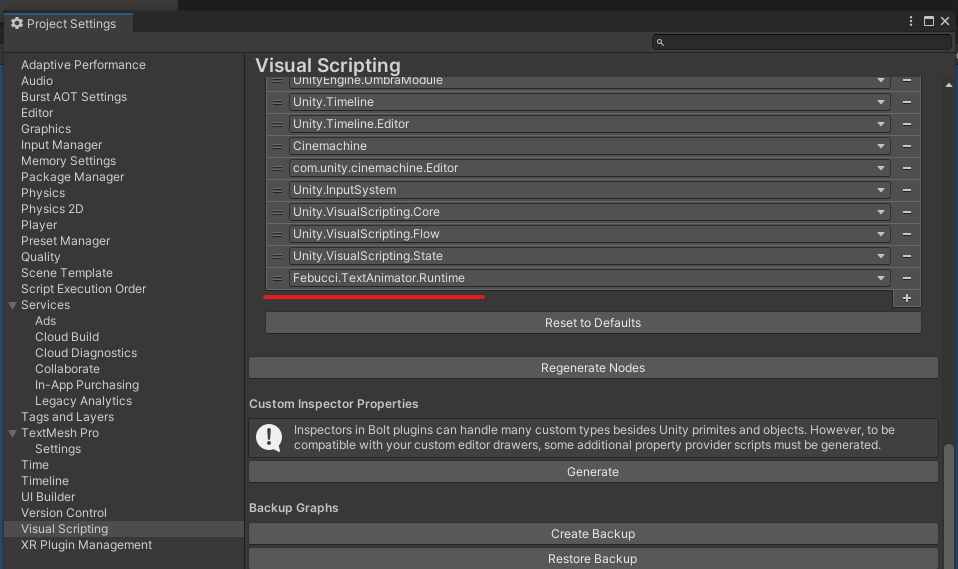 You should also add any integration's assembly (e.g. "Febucci.TextAnimator.TMP.Runtime"). Then, click "Regenerate Nodes".
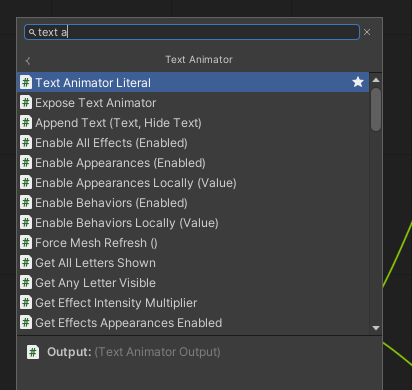
You will now be able to use all TextAnimator methods in your visual scripting graphs, like the Typewriter's "ShowText" and "Start Typewriter".
You can find the TextAnimator Scripting Api here, or simply create a new node in the Visual Scripting Graph:
 In order to subscribe to TextAnimator events (e.g. playing audio when a character is shown), you need to create a Custom Event.
To do so, you can either import the "Visual Scripting - Integration" package that you can find in the TextAnimator folder, or you manually create a C# class that acts like a "bridge" between Text Animator and Unity Visual Scripting like this: 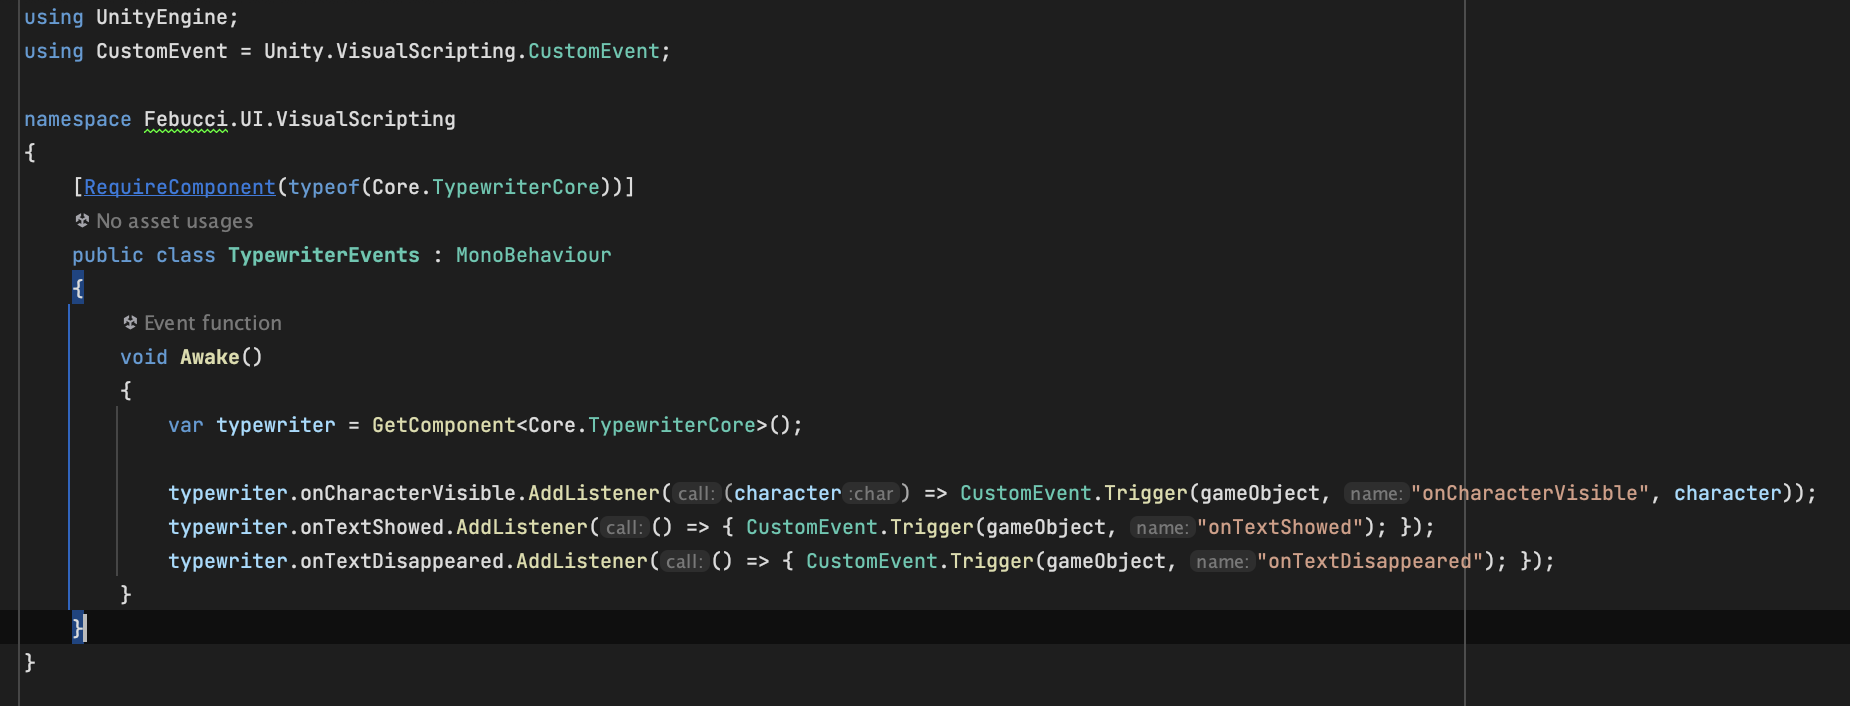 P.S. be sure to include its assembly in the "Nodes" section of the visual scripting settings (and then hit "regenerate nodes"), like you did before with Text Animator. You will now be able to use trigger from these events in your graph like this:
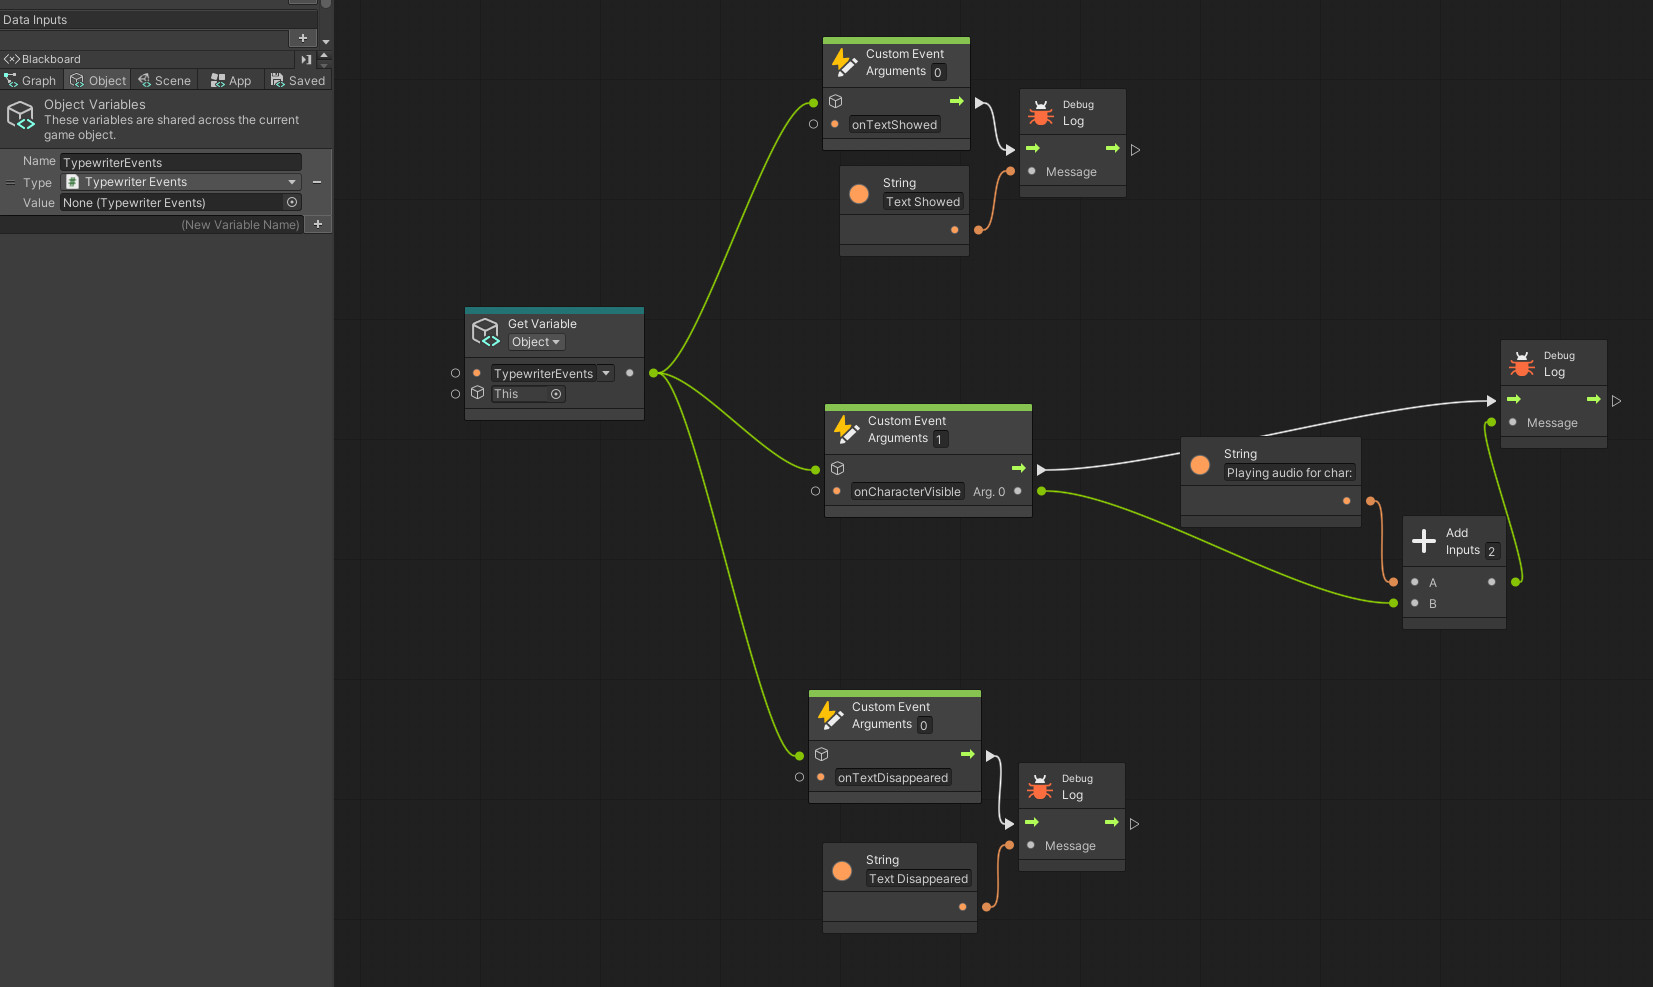
Partial Integration
The following plugins work with TextAnimator, but some of its feature might not be available.
✔️Naninovel
How to setup 'Naninovel' with 'Text Animator'
With Naninovel, you can use TextAnimator's animations but not the TextAnimatorPlayer component (TextAnimator's typewriter). You have to use Naninovel's typewriter.
It is a compromise in order to not change any plugin structure and stability <3
- You need to create and set a "Naninovel Text Mesh Pro printer", for example duplicating its "TMProDialogue" prefab. Please read the Naninovel's guide on how to add printers to naninovel.
- Your TMPro printer must have a `TextAnimator_TMP` component on the text gameObject that you want to animate.
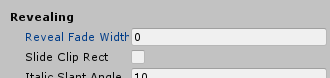
- In the text gameObject that you want to animate (like"DialogueText"), edit the "ReveableTMProText"'s "Revealing section" and disable its fade effect. You could keep this active, but TextAnimator's effects may change because of it (with a fade effect applied.); it's suggested to use TextAnimator's one at this point.
- Import the following script in your project, and add that 'TAnim_NaninovelPaster' to the text gameObject (which has Text Animator and Reveable Printer)
- Done! (Don't forget to set that printer as active in your Naninovel dialogues.)
Extra: to create a printer with TextAnimator, one example may be duplicating the TMProDialogue prefab (which has the "ReveableTextPrinterPanel" component on top), locating the "DialogueText" gameobject and adding the "TextAnimator" component near the "ReveableTMProText" component.
Investigating
The following plugins are currently being researched and their integration with TextAnimator is not guaranteed (with our without code). Please read How to manually integrate Text Animator for more info and the Public Roadmap.